

How To Setup Git Windows
Introduction
Git is a widely used open-source software tracking application used to track projects across unlike teams and revision levels.
This guide will show you how to install Git on Windows.
Prerequisites
- Administrator privileges
- Access to a command-line
- Your favorite coding text editor
- Username and countersign for the Github website (optional)
Steps For Installing Git for Windows
Installing Git prompts you lot to select a text editor. If you don't have ane, nosotros strongly advise you to install prior to installing Git. Our roundup of the best text editors for coding may help you decide.
Annotation: If you are new to Git, refer to our mail How Does Git Work to learn more most Git workflow and Git functions.
Download Git for Windows
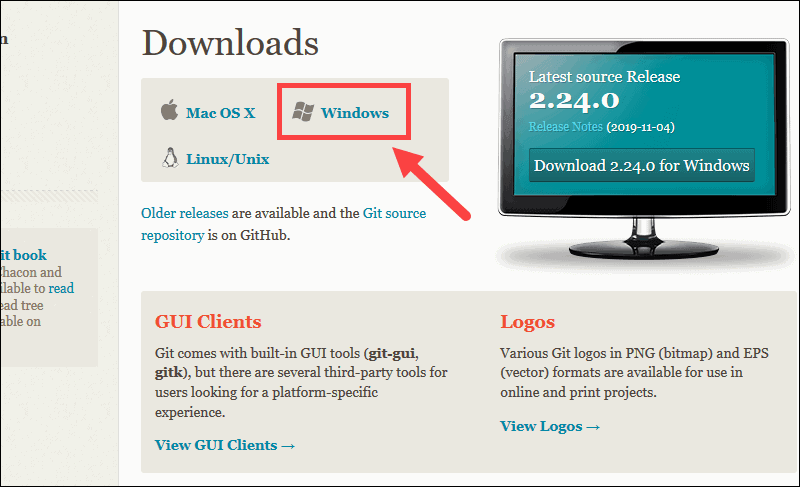
1. Scan to the official Git website: https://git-scm.com/downloads
two. Click the download link for Windows and allow the download to consummate.
Extract and Launch Git Installer
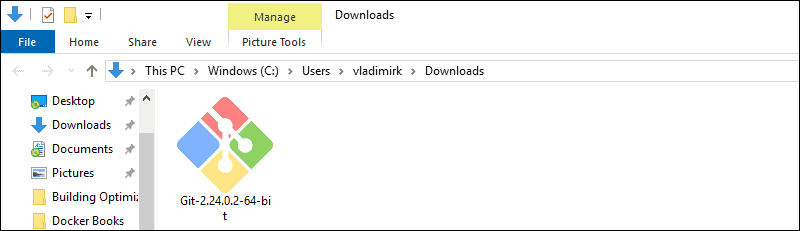
three. Browse to the download location (or use the download shortcut in your browser). Double-click the file to excerpt and launch the installer.
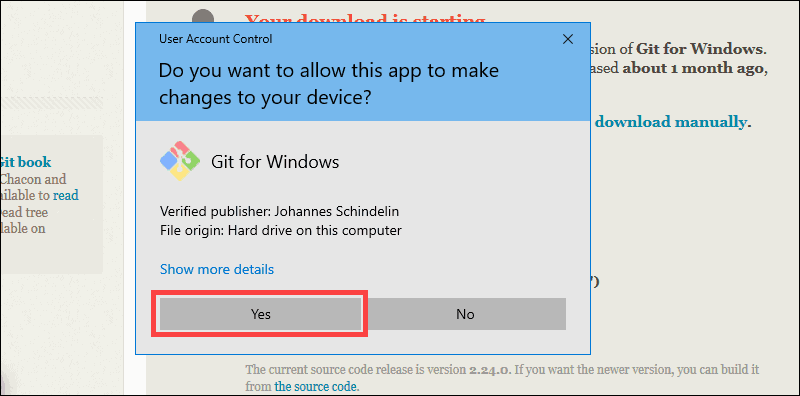
4. Permit the app to make changes to your device by clicking Yes on the User Account Control dialog that opens.
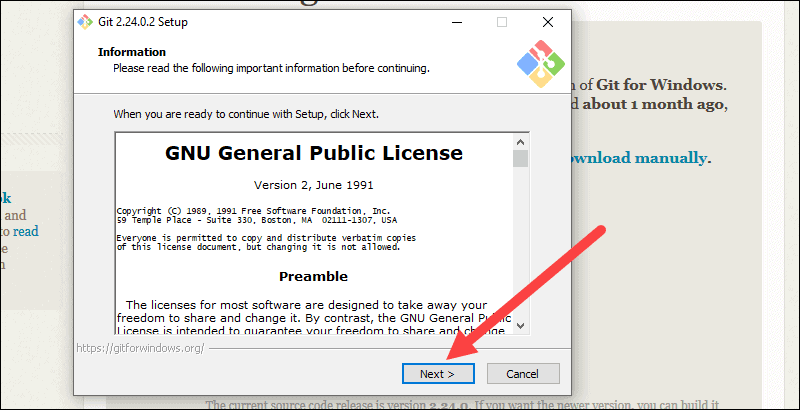
five. Review the GNU Full general Public License, and when y'all're ready to install, click Next.
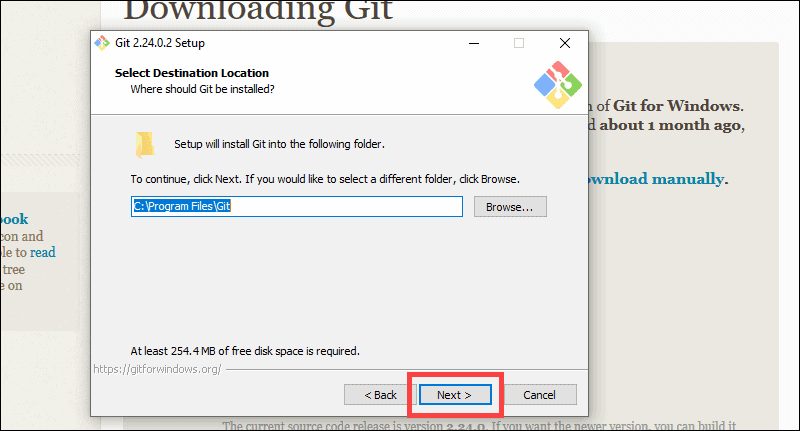
six. The installer will inquire you for an installation location. Leave the default, unless you have reason to change information technology, and click Side by side.
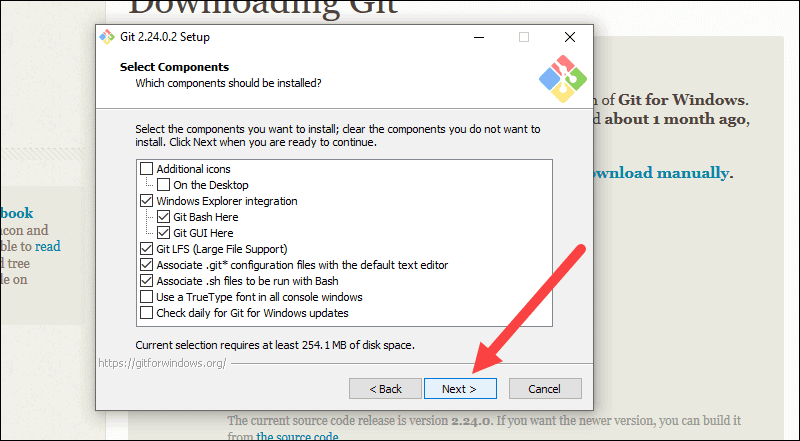
7. A component selection screen will appear. Get out the defaults unless you have a specific need to modify them and click Side by side.
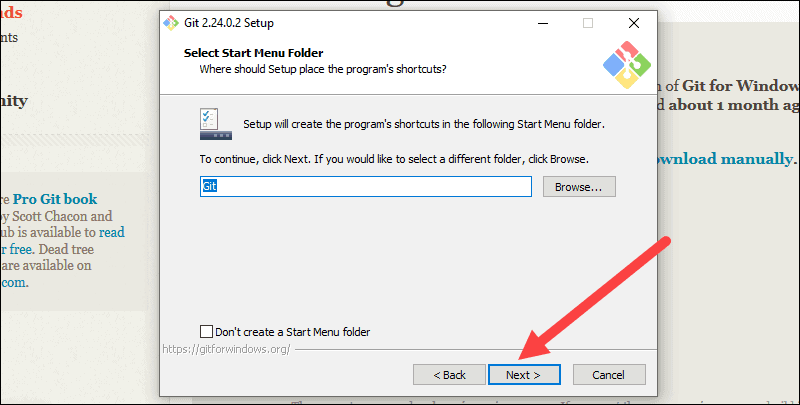
8. The installer will offer to create a first menu folder. Simply click Next.
nine. Select a text editor you'd similar to utilize with Git. Utilize the drop-downwardly menu to select Notepad++ (or whichever text editor you prefer) and click Next.

10. The next step allows you to cull a different name for your initial branch. The default is 'primary.' Unless you're working in a team that requires a different name, get out the default option and click Side by side.

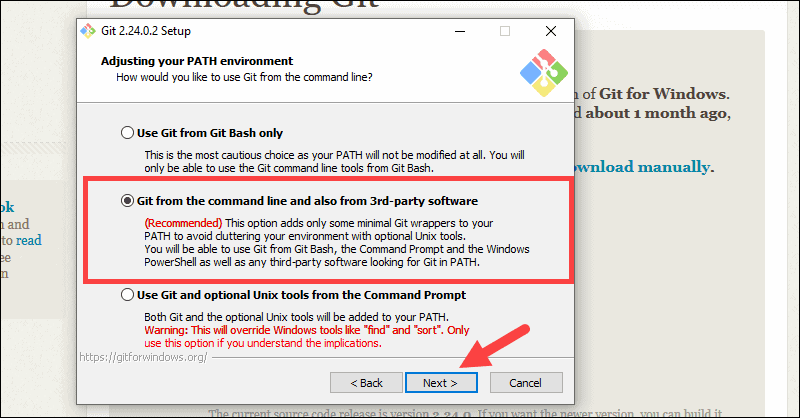
11. This installation step allows you to change the PATH surround. The PATH is the default ready of directories included when you run a control from the command line. Leave this on the middle (recommended) pick and click Next.
Server Certificates, Line Endings and Terminal Emulators
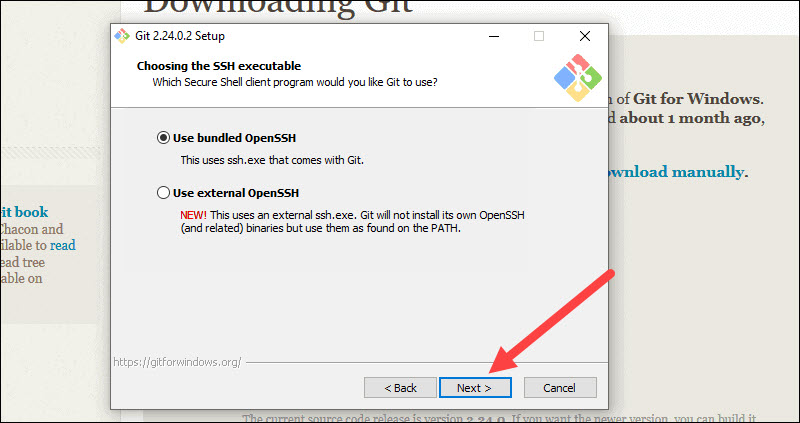
12. The installer now asks which SSH client you desire Git to use. Git already comes with its own SSH client, so if yous don't need a specific one, leave the default pick and click Next.
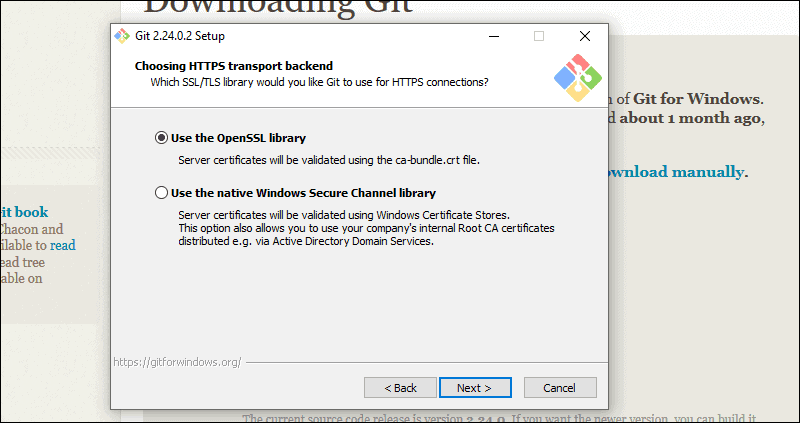
13. The side by side option relates to server certificates. Most users should use the default. If you lot're working in an Agile Directory surround, y'all may need to switch to Windows Store certificates. Click Next.
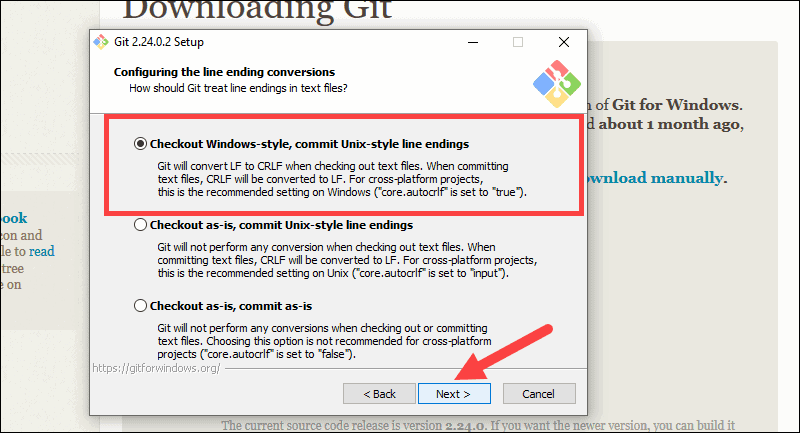
14. The adjacent selection converts line endings. It is recommended that you leave the default selection. This relates to the way information is formatted and irresolute this choice may crusade bug. Click Next.
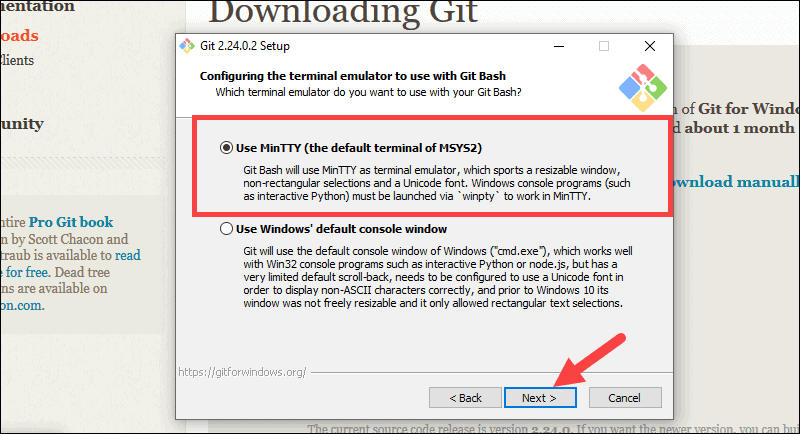
15. Choose the terminal emulator y'all want to utilize. The default MinTTY is recommended, for its features. Click Next.
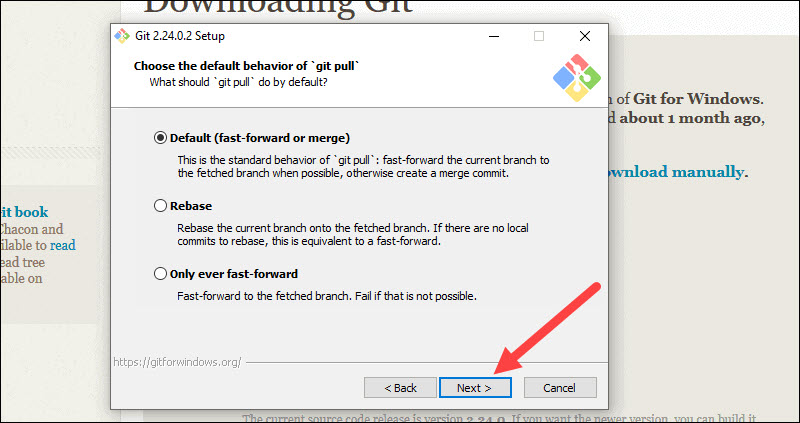
16. The installer now asks what the git pull command should practice. The default choice is recommended unless you specifically need to change its behavior. Click Next to continue with the installation.
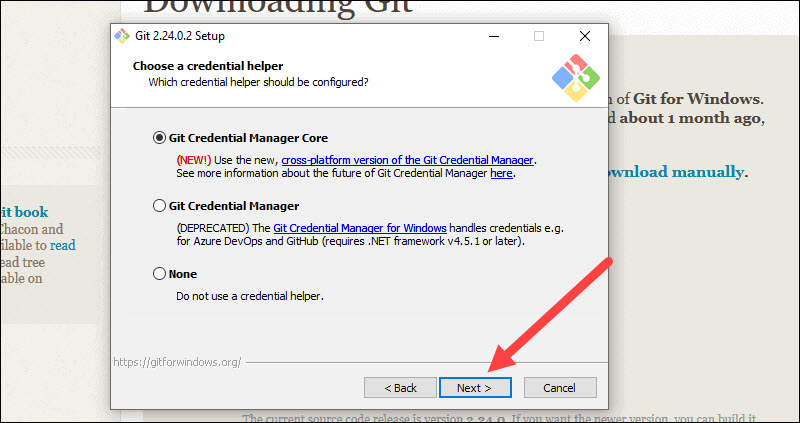
17. Next you should choose which credential helper to use. Git uses credential helpers to fetch or relieve credentials. Get out the default option every bit information technology is the virtually stable one, and click Next.
Boosted Customization Options
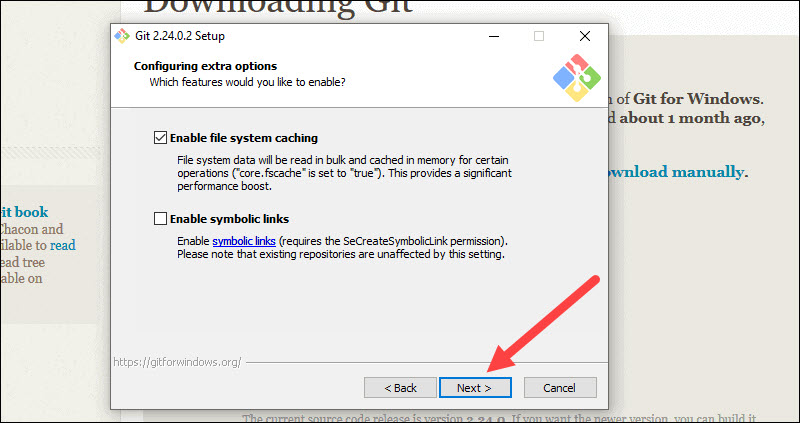
18. The default options are recommended, however this step allows yous to decide which actress selection you would like to enable. If you use symbolic links, which are like shortcuts for the command line, tick the box. Click Next.
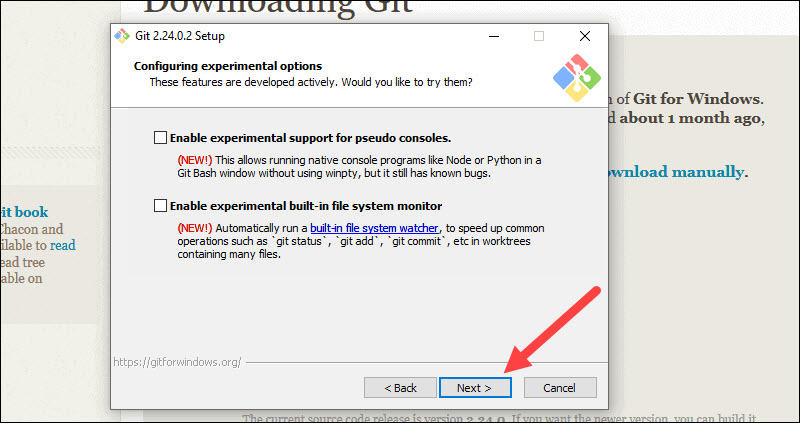
19. Depending on the version of Git you're installing, information technology may offering to install experimental features. At the time this article was written, the options to include support for pseudo controls and a built-in file system monitor were offered. Unless you are feeling adventurous, get out them unchecked and click Install.
Complete Git Installation Process
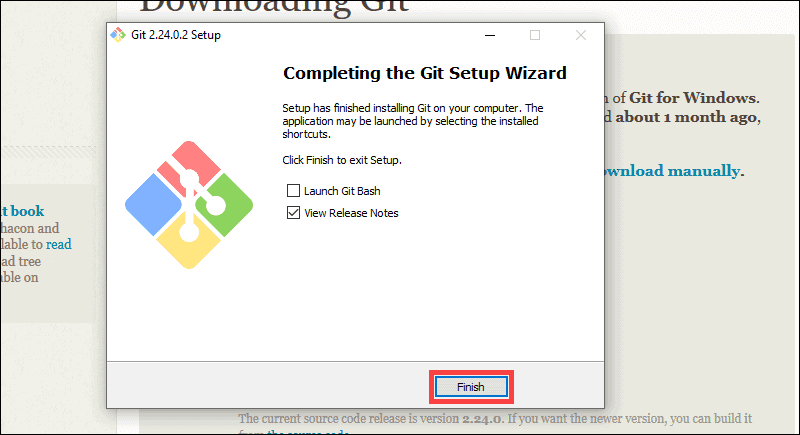
20. Once the installation is complete, tick the boxes to view the Release Notes or Launch Git Bash, so click Finish.
How to Launch Git in Windows
Git has two modes of utilize – a bash scripting shell (or command line) and a graphical user interface (GUI).
Launch Git Bash Shell
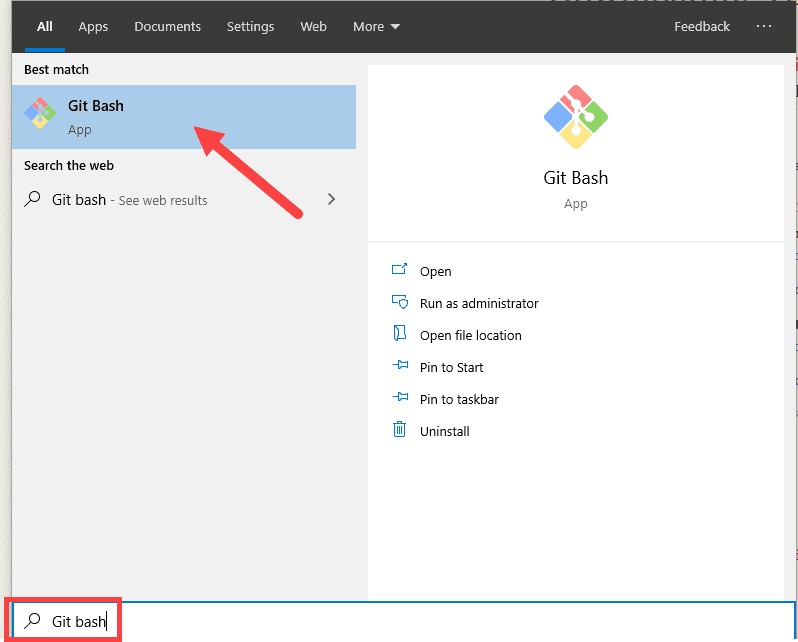
To launch Git Bash open the Windows Start menu, blazon git bash and press Enter (or click the awarding icon).
Launch Git GUI
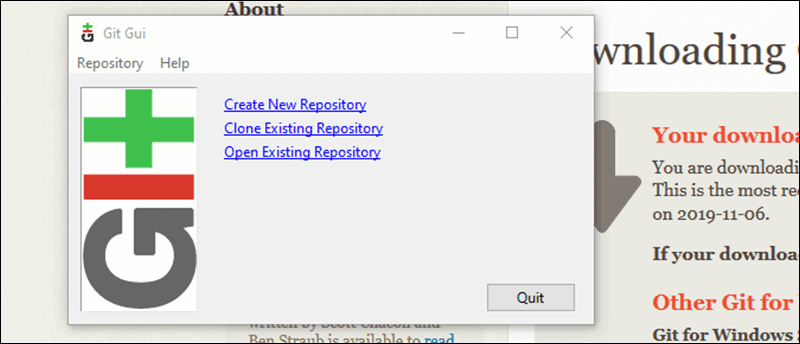
To launch Git GUI open the Windows Start carte, type git gui and printing Enter (or click the application icon).
Connecting to a Remote Repository
Yous demand a GitHub username and password for this next step.
Create a Test Directory
Open a Windows PowerShell interface by pressing Windows Key + ten, and then i once the menu appears.
Create a new exam directory (folder) by inbound the following:
mkdir git_test An case of the PowerShell output.
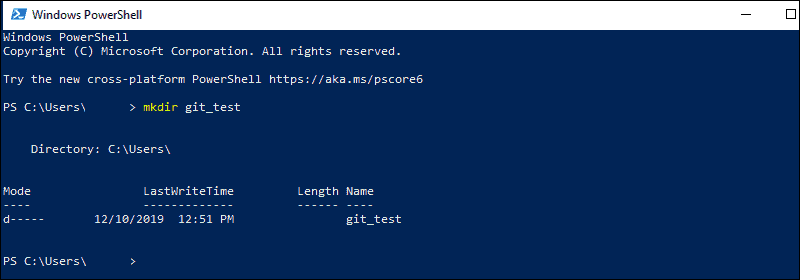
Change your location to the newly created directory:
cd git_test Note: If you already have a GitHub repository, use the proper noun of that project instead of git_test.
Configure GitHub Credentials
Configure your local Git installation to use your GitHub credentials past entering the following:
git config --global user.proper noun "github_username" git config --global user.email "email_address" Notation: Replace github_username and email_address with your GitHub credentials.
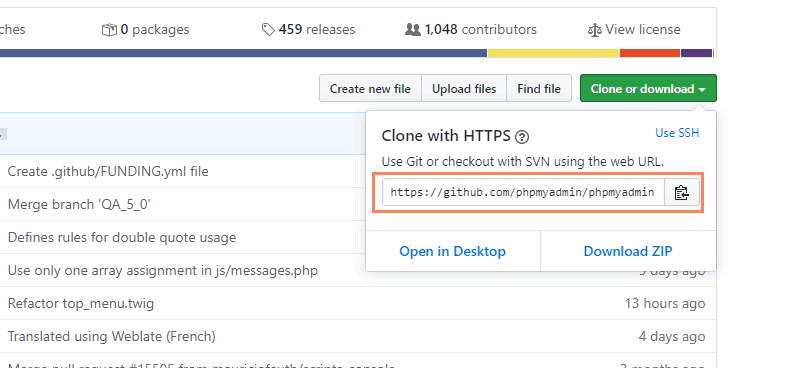
Clone a GitHub Repository
Become to your repository on GitHub. In the summit right above the listing of files, open up the Clone or download drop-down carte du jour. Copy the URL for cloning over HTTPS.
Switch to your PowerShell window, and enter the following:
git clone repository_url Important: In the case above, the control will clone the repository over HTTPS. Another option is cloning with SSH URLs. For that option to work, you must generate an SSH key pair on your Windows workstation and assign the public primal to your GitHub account.
List Remote Repositories
Your working directory should now accept a copy of the repository from GitHub. Information technology should contain a directory with the name of the project. Change to the directory:
cd git_project Annotation: Supervene upon git_project with the actual proper name of the repository you lot downloaded. If it's not working, you can listing the contents of the current directory with the ls command. This is helpful if you don't know the exact proper noun or need to cheque your spelling.
Once you're in the sub-directory, list the remote repositories:
git remote -v Pushing Local Files to the Remote Repository
Once you've done some piece of work on the project, you lot may want to submit those changes to the remote project on GitHub.
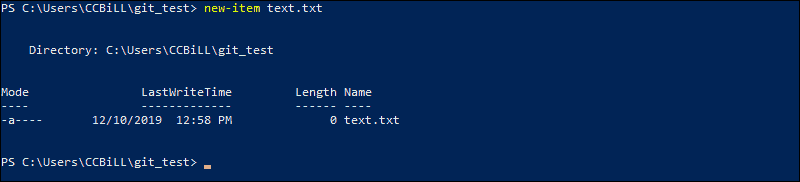
1. For instance, create a new text file by inbound the post-obit into your PowerShell window:
new-item text.txt 2. Confirmation that the new file is created.
three. Now cheque the status of your new Git branch and untracked files:
git status iv. Add your new file to the local projection:
git add text.txt five. Run git status again to make sure the text.txt file has been added. Adjacent, commit the changes to the local project:
git commit -m "Sample 1" 6. Finally, push the changes to the remote GitHub repository:
git button You may need to enter your username and countersign for GitHub.
Annotation: You can remove a remote repository if the need for it no longer exists. To learn how, visit our guide How to Remove a Git Remote.
Conclusion
Y'all at present have a working installation of Git on your Windows organisation. After installing Git on your Windows, y'all might discover helpful how to update Git. Use Git's features to coordinate work among programmers on a project.
For Linux and MacOS installation guides, check out our articles on installing Git on Ubuntu, CentOS and MacOS.
Was this article helpful?
Aye No
Source: https://phoenixnap.com/kb/how-to-install-git-windows
Posted by: mettsdephateras1993.blogspot.com
0 Response to "How To Setup Git Windows"
Post a Comment